
Preparation
What You Need:
- Private area
- Testing devices
- PPE (gloves, etc.)
- Absorbent pad (e.g., blue hospital pad)
- Chain of Custody (COC) forms
- Waste disposal bag
Donor Interaction
- Introduce yourself to the donor.
- Confirm consent:
- Ask if they’re familiar with drug policy.
- Get verbal & written consent.
- Confirm identity:
- Use ID or supervisor confirmation.
- Record on COC form.
- Check for food/drink:
- Must be nil by mouth for 20 minutes.
- Complete paperwork:
- Signatures from collector & donor.
- Record device lot # and expiry.
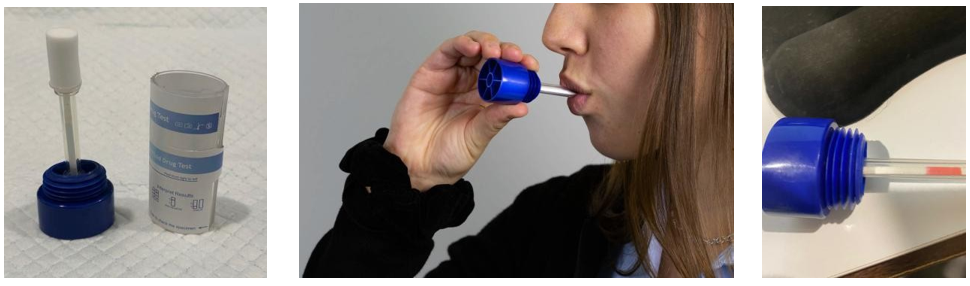
Collection Procedure
- Donor selects device.
- Instruct donor
- Put wand into mouth
- Lean forward.
- Don’t chew or bite sponge.
- Notify when sponge is soft. (2-3 minutes typically)
- Check color indicator (if applicable).
- Insert wand into test device, and keep upright.
- Remove label and wait for control lines.
Check both sides of the device!

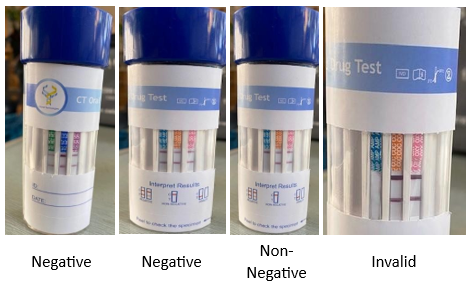
Reading the Test
| RESULT | WHAT TO LOOK FOR |
| Negative | Line in C (Control) & T (Test), even faint. |
| Non-Negative | Line in C, but no line in T. |
| Invalid | No line in C = test failed, redo. |
If Test is Non-Negative
- Explain result to donor.
- Collect confirmation sample and referee sample using Quantisal vials.
- Label & seal with tamper-proof seals.
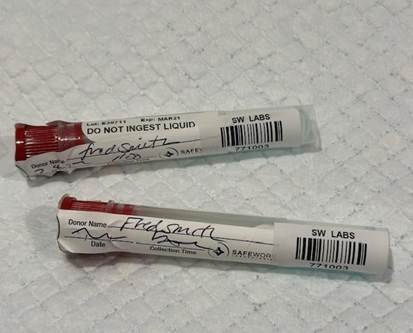
- Apply barcodes to:
- COC forms
- Vials
- Transport doc
- Donor signs declaration.
- Store sample in chilled, locked container.
- Notify company rep privately.
- Dispose of used materials safely.
Tips and Reminders
- Stay with donor until testing is finished.
- Always wear gloves (PPE).
- Provide a private collection area.
- Never test without consent.
- Keep a waste bag nearby.