
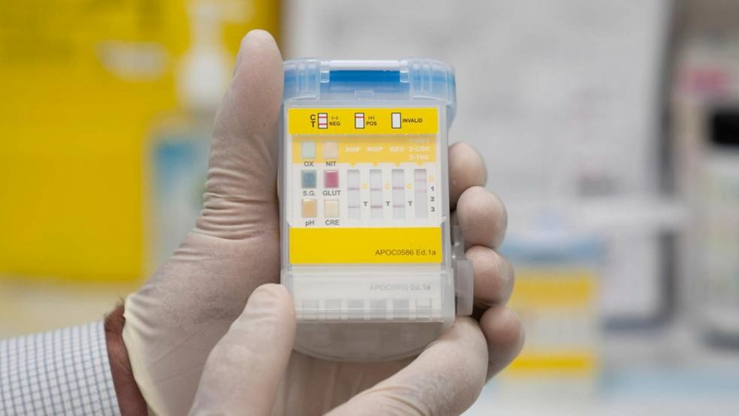
Explaining Results to the Donor
- If a test result is non-negative, show the donor the results.
- Explain how to read the test, ensuring that all control lines are visible.
- Inform the donor that only a certified laboratory can confirm the screening result.
- Outline the next steps, including sending the sample to a lab for further testing.
- Explain the “referee sample” which will be held so that they can request an independent lab test if they disagree with the results (at their own cost, unless the result is later confirmed negative). *Please note, your labs protocols may vary
Laboratory Testing Process
Each laboratory may have different procedures, so confirm the correct protocol beforehand.
| Safework Laboratories Procedure. Materials in the Laboratory Split Kit: • 3 specimen tubes • 3 security seals • 1 specimen transport bag • 1 set of barcodes • 1 vacuum straw | 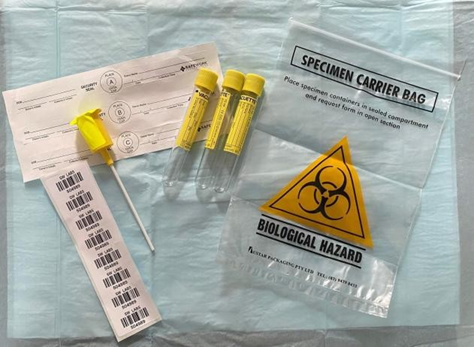 |
Step-by-Step Procedure:
| 1. Select a Vacutainer Spike Kit | 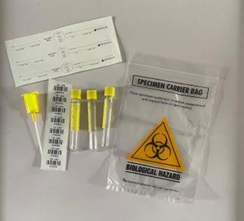 |
| 2. Fill out the security labels | 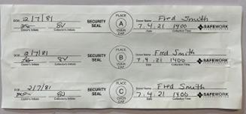 |
| 3. Attach barcodes to both the Chain of Custody (COC) document and Section D of the Transport COC form. | 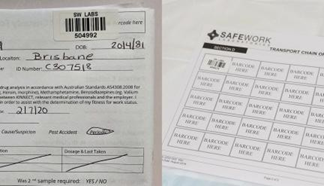 |
| 4. Prepare the urine sample: – Remove the seal from the pipette. Insert the straw into the sample cup. – Take care as the pipette contains a sharp spike | 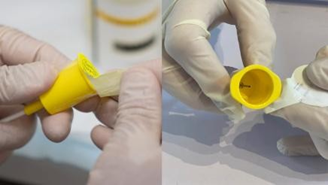 |
| – Use a Vacutainer to draw up the sample by pressing the end into the pipette | 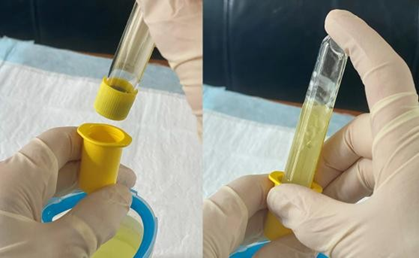 |
| 5. Secure and label the samples: – Attach security seal stickers to all three sample tubes. – Place a barcode on each tube (ensure proper placement for scanning). | 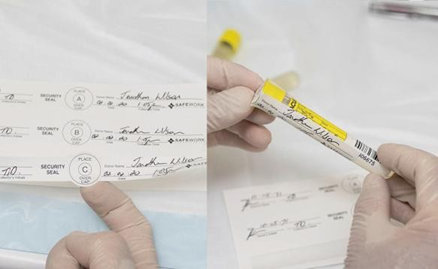 |
| 6. Packing the sample – Place the vacuettes and paperwork into the sample bag and place sample in locked fridge or transport cooler with ice bricks | 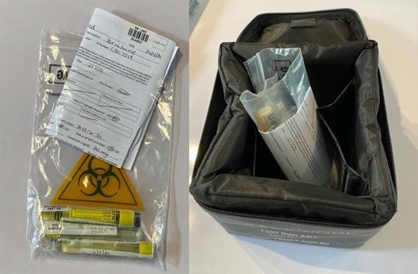 |
Sending Samples to the Laboratory
- Verify and document samples:
- Count the samples and barcodes.
- Ensure barcodes on samples match those on the Transport COC form.
- Secure the transport bag:
- Place samples inside a cooler bag or satchel.
- Lock the bag with a security tab key.
- Record the security tab number on the Transport COC form.
- Organize transportation:
- Place the Transport COC form in the sleeve window of the cooler bag or with the satchel.
- Ensure the courier completes Section B of the Transport COC form upon pickup.
Conclusion
- Always follow your company’s policy when handling non-negative test results.
- Proper documentation and security are essential to maintain the chain of custody and ensure accurate testing.
| Sample : (each lab’s protocols may vary) Transport Chain of Custody form, transport cooler and security key. | 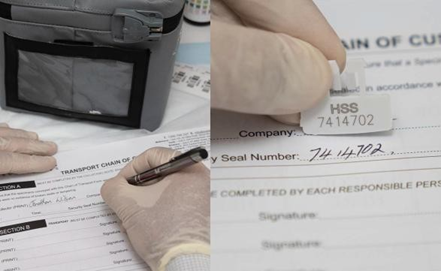 |
| Sample: Locking a transport cooler with security key. | 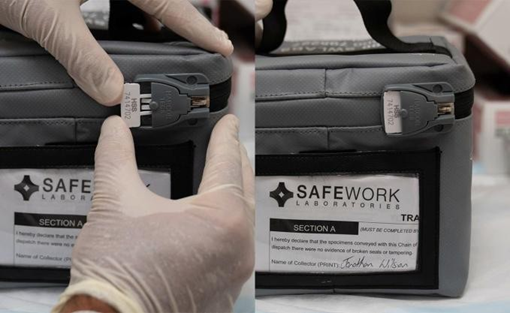 |